// tutorial
From download to your first team project.
Step by step, with the app's screens. The first time, Kompil itself opens an eight-step guided tour — and you can replay it under Help › Kompil tutorial (Ajuda › Tutorial do Kompil). The app interface is in Portuguese (Brazil).
- 01
Download and install
On this site's Download page, choose Windows: the installer downloads right away. Open Kompil-Setup.exe; if Windows shows “Windows protected your PC”, click More info → Run anyway. Accept the terms, choose the folder and shortcuts: Kompil opens by itself and future versions arrive through automatic updates.
- Windows 10 and 11 (64-bit)
- ~600 MB free
- Containers: WSL 2 (the Kompil Engine installs the rest)
- 02
Sign in or create your account
The app asks for an account to get started. Sign in with your email or create a free account: the confirmation code arrives by email. Then four quick welcome questions tailor the app to you.
Sign in or create your account
- 03
Take the guided tour
The first time, a one-minute tour lights up each important part of the screen with an arrow and an explanation: where to create projects, search, the menus, themes and layout, your account and what's inside a project. You can skip it at any time.
Take the guided tour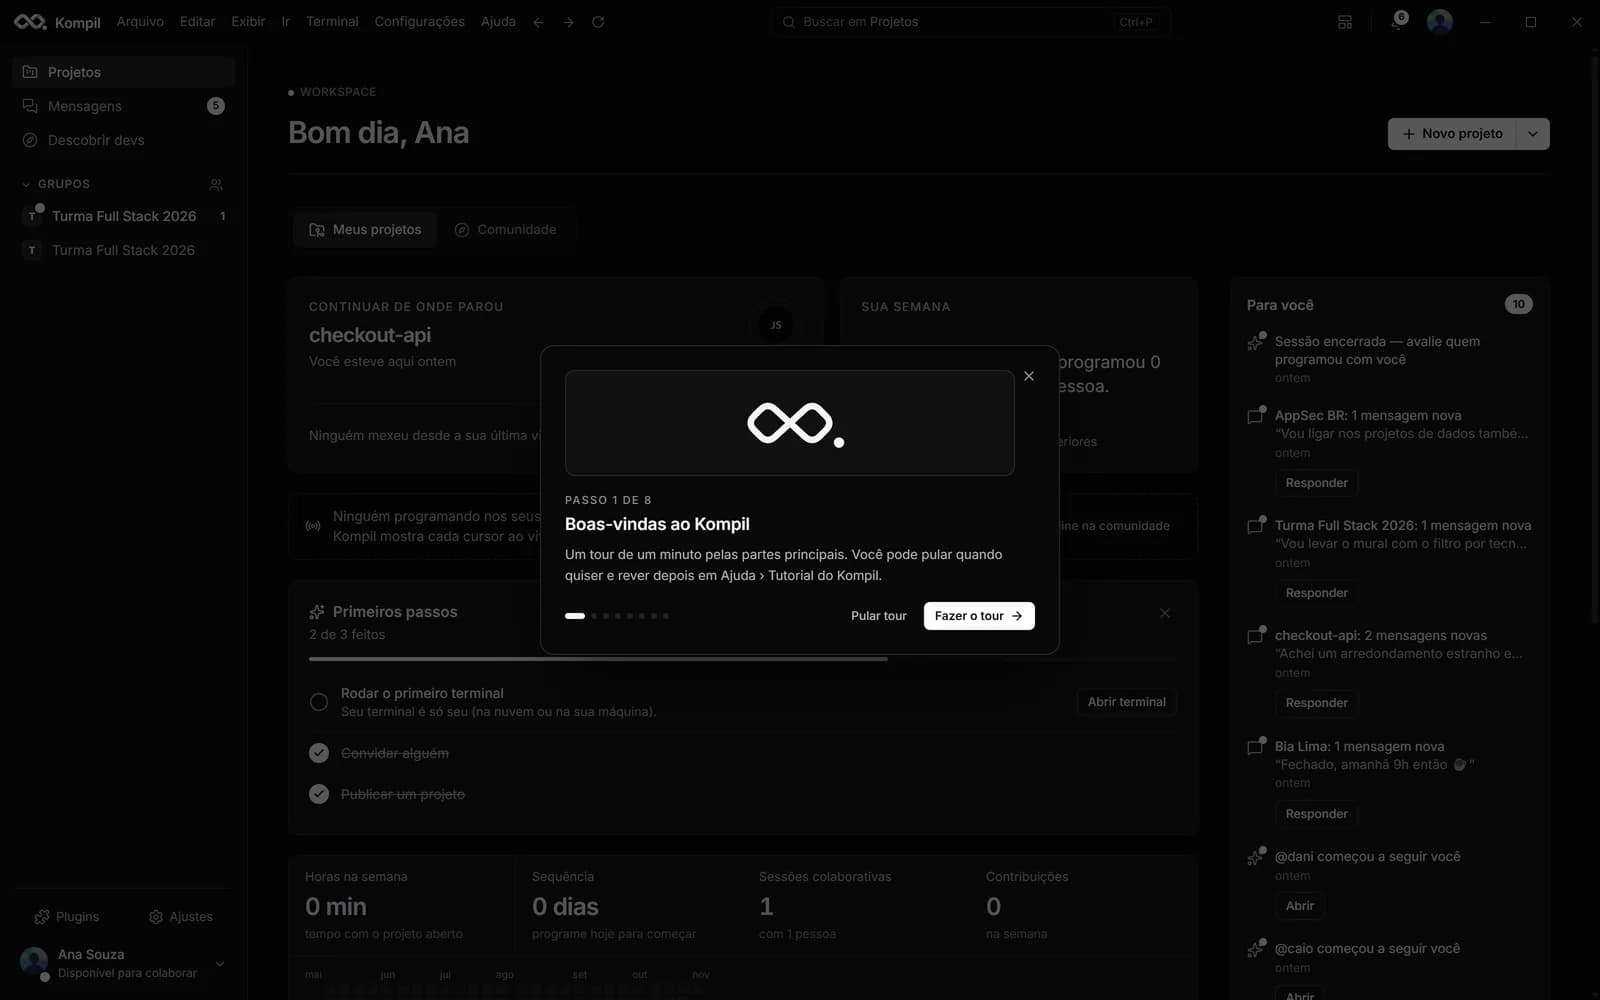
- 04
Create or import a project
“Everything starts here” (Tudo começa aqui): create a project from a template, import a GitHub repository or a folder from your computer. If the folder has a .git with a remote and GitHub is connected, the repository links itself.
- Shortcut: Ctrl+Alt+N
Create or import a project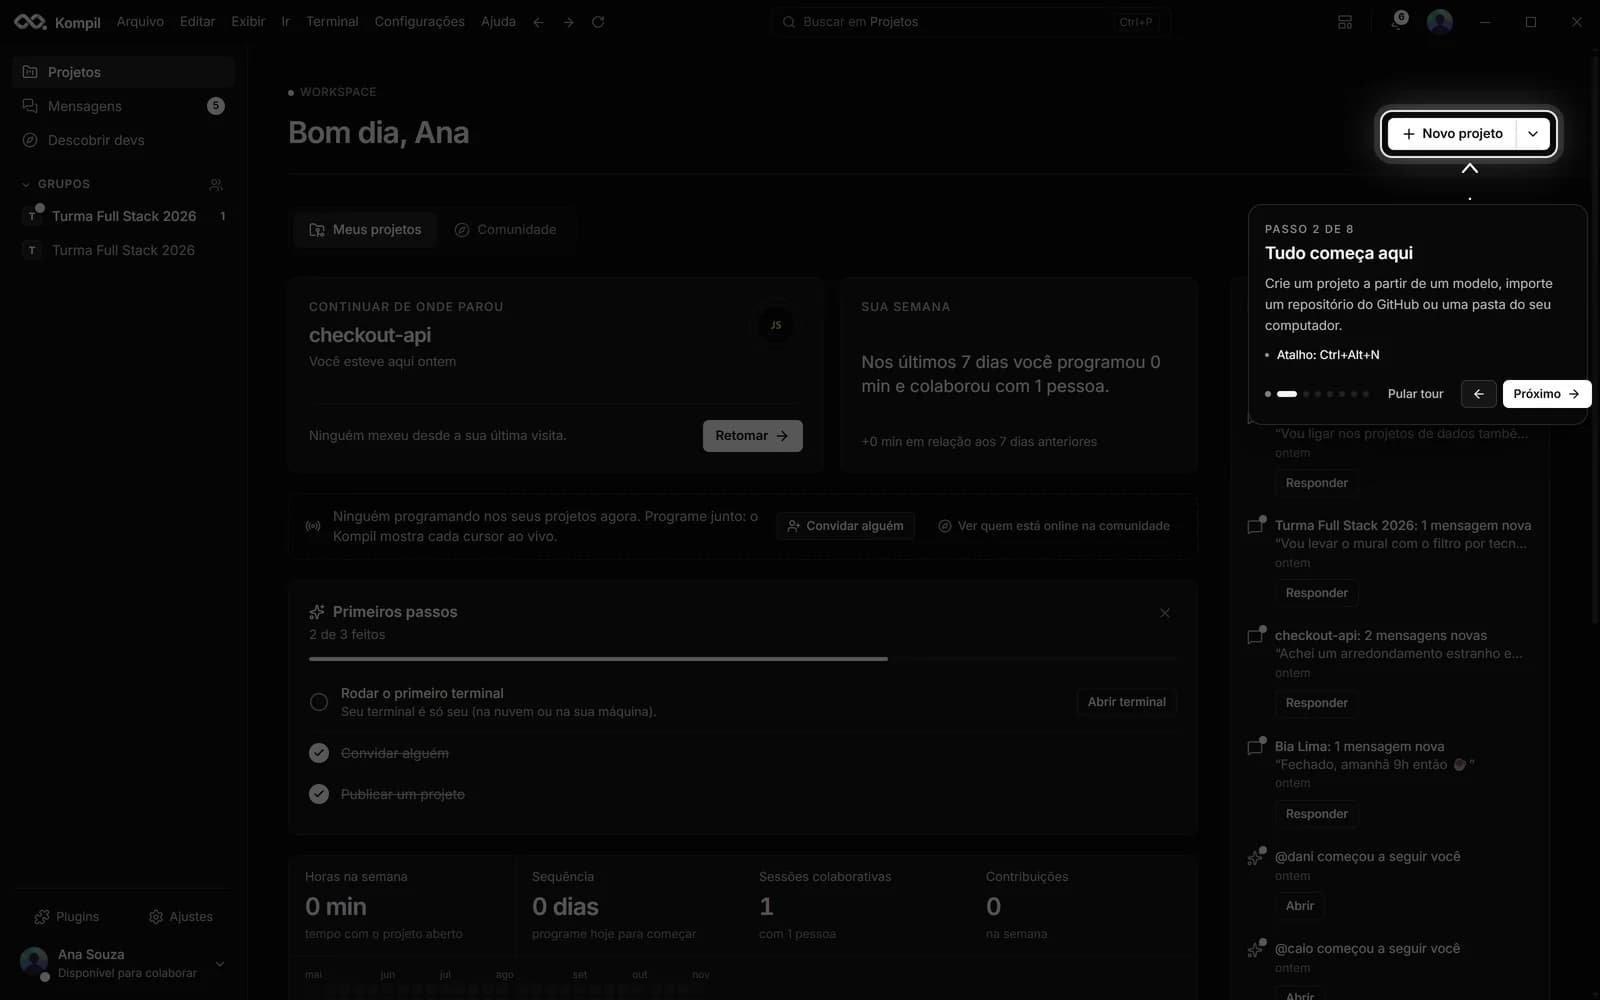
- 05
Find anything
Files, projects and commands in one place, in the search box on the title bar.
- Files and projects: Ctrl+P
- All commands: Ctrl+Shift+P
Find anything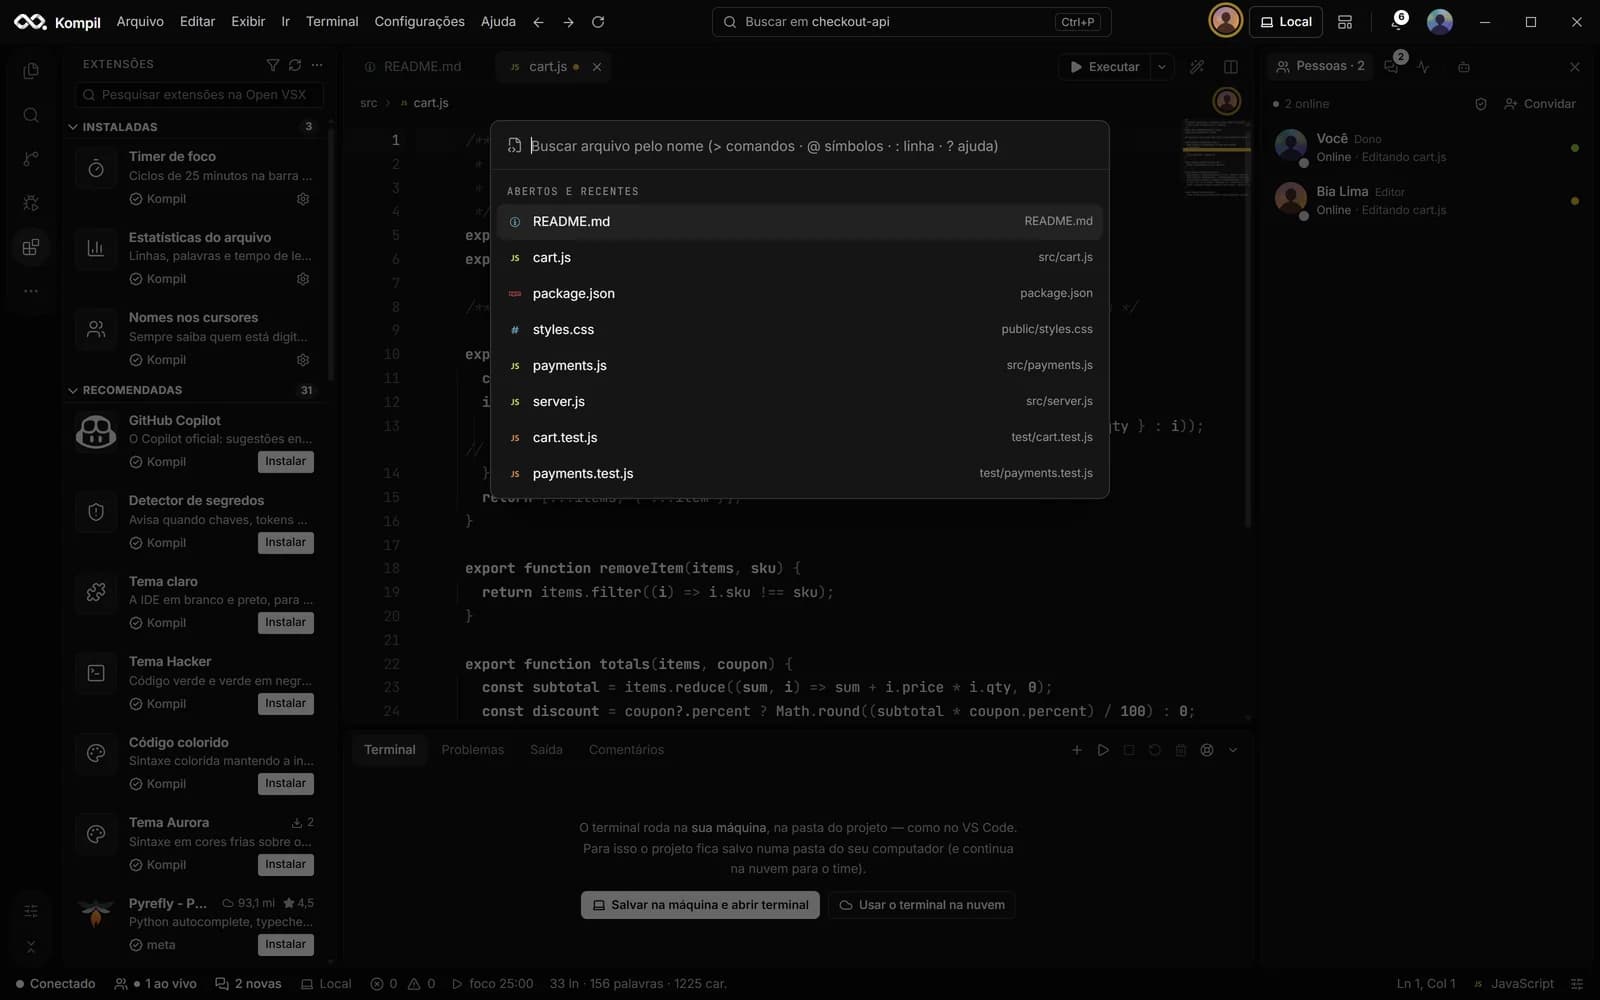
- 06
Invite the team and code together
In the People panel (Pessoas), Invite creates an invitation with each person's role. Whoever joins shows up with their cursor and name in the file they are in, and clicking an avatar takes you to that person's cursor.
Who is in the file right now · 7
Invite the team and code together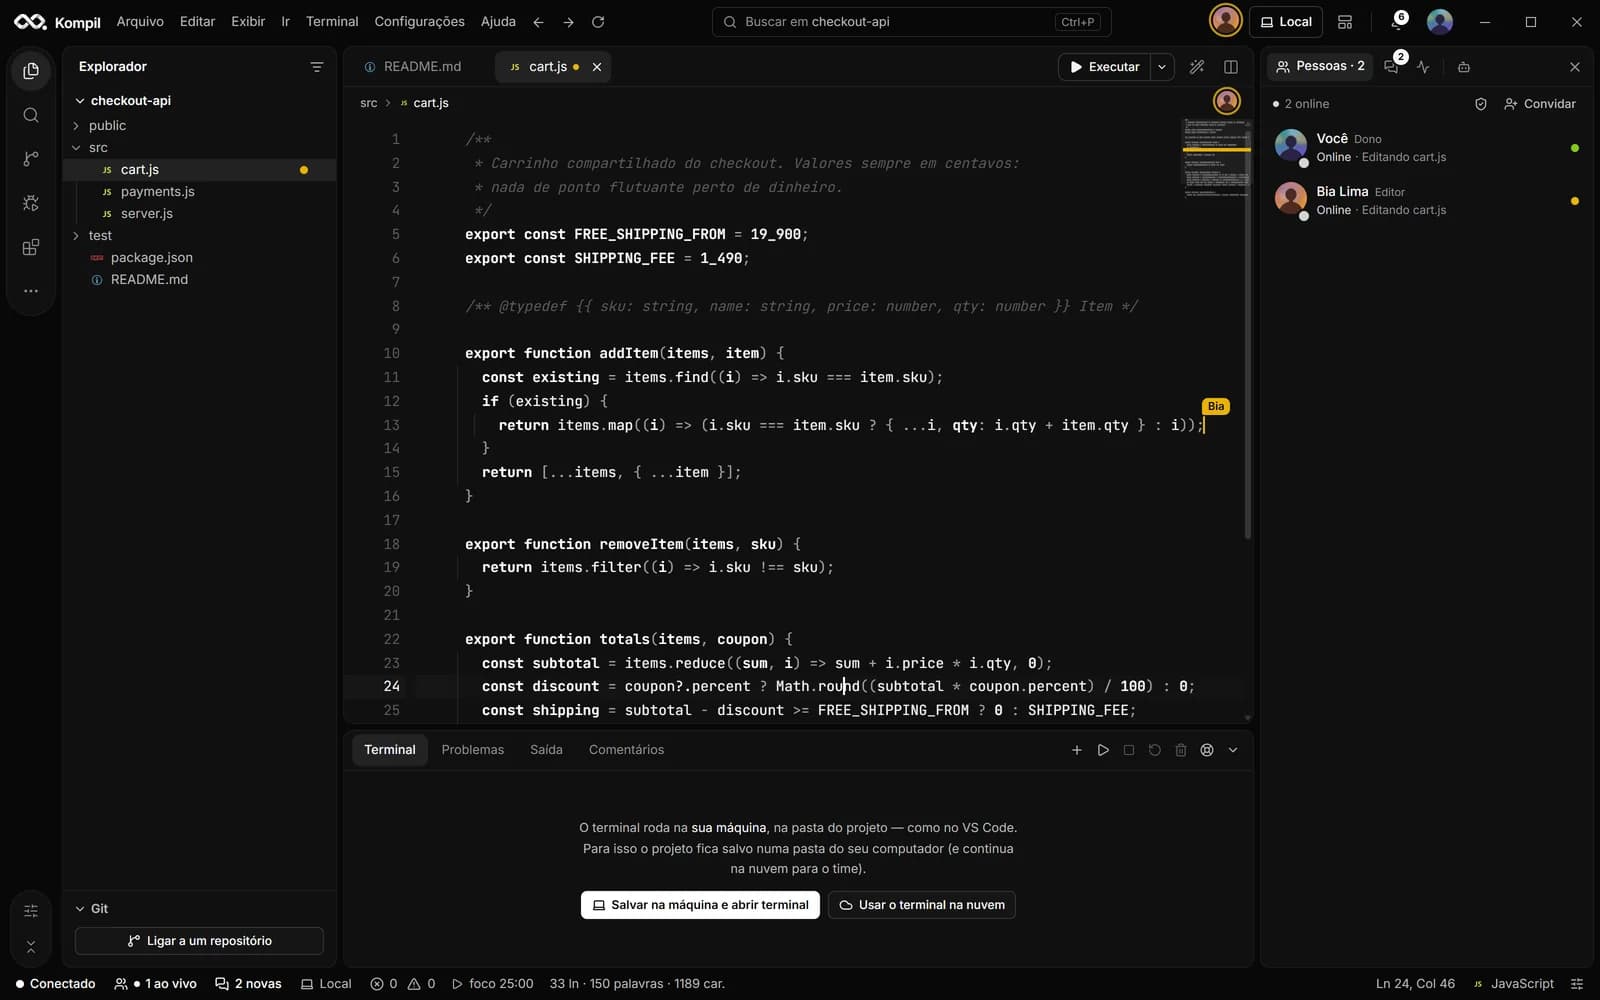
- 07
Comment on a line and chat
Hover over the gutter and click the “+” to comment on a line; Ctrl+Enter sends it. The project chat sits on the right side.
Comment on a line and chat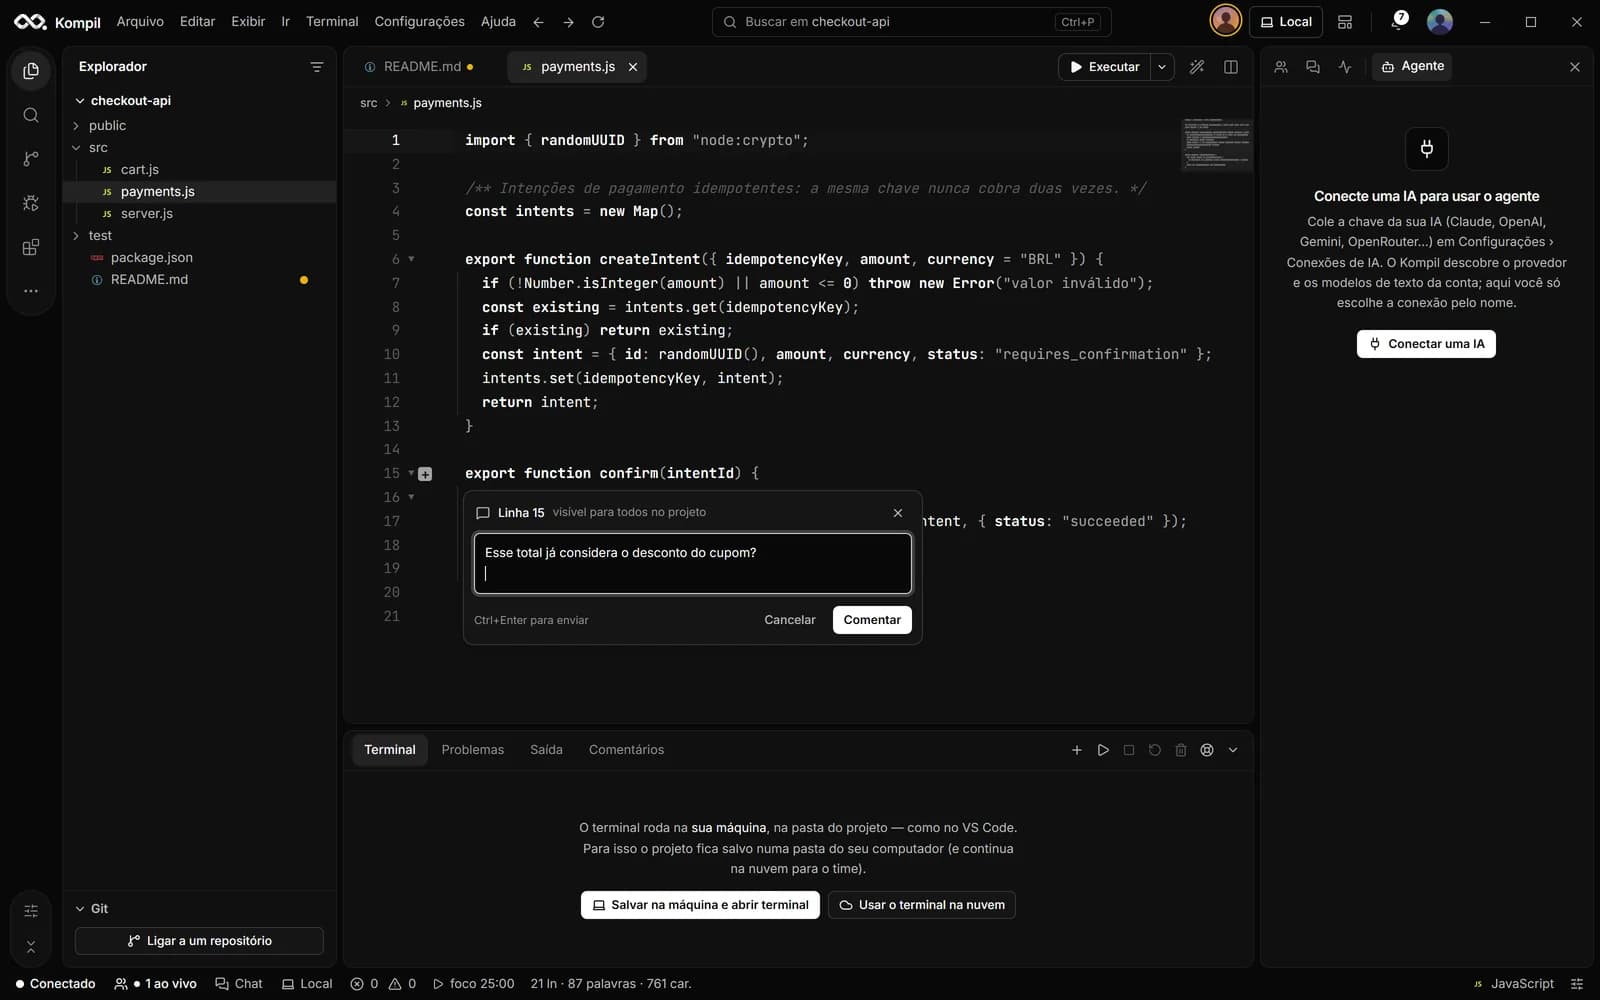
- 08
Run and debug
Run (F5) starts the project; the terminal sits at the bottom (Ctrl+`). To pause, click next to the line number or press F9 for a breakpoint.
Run and debug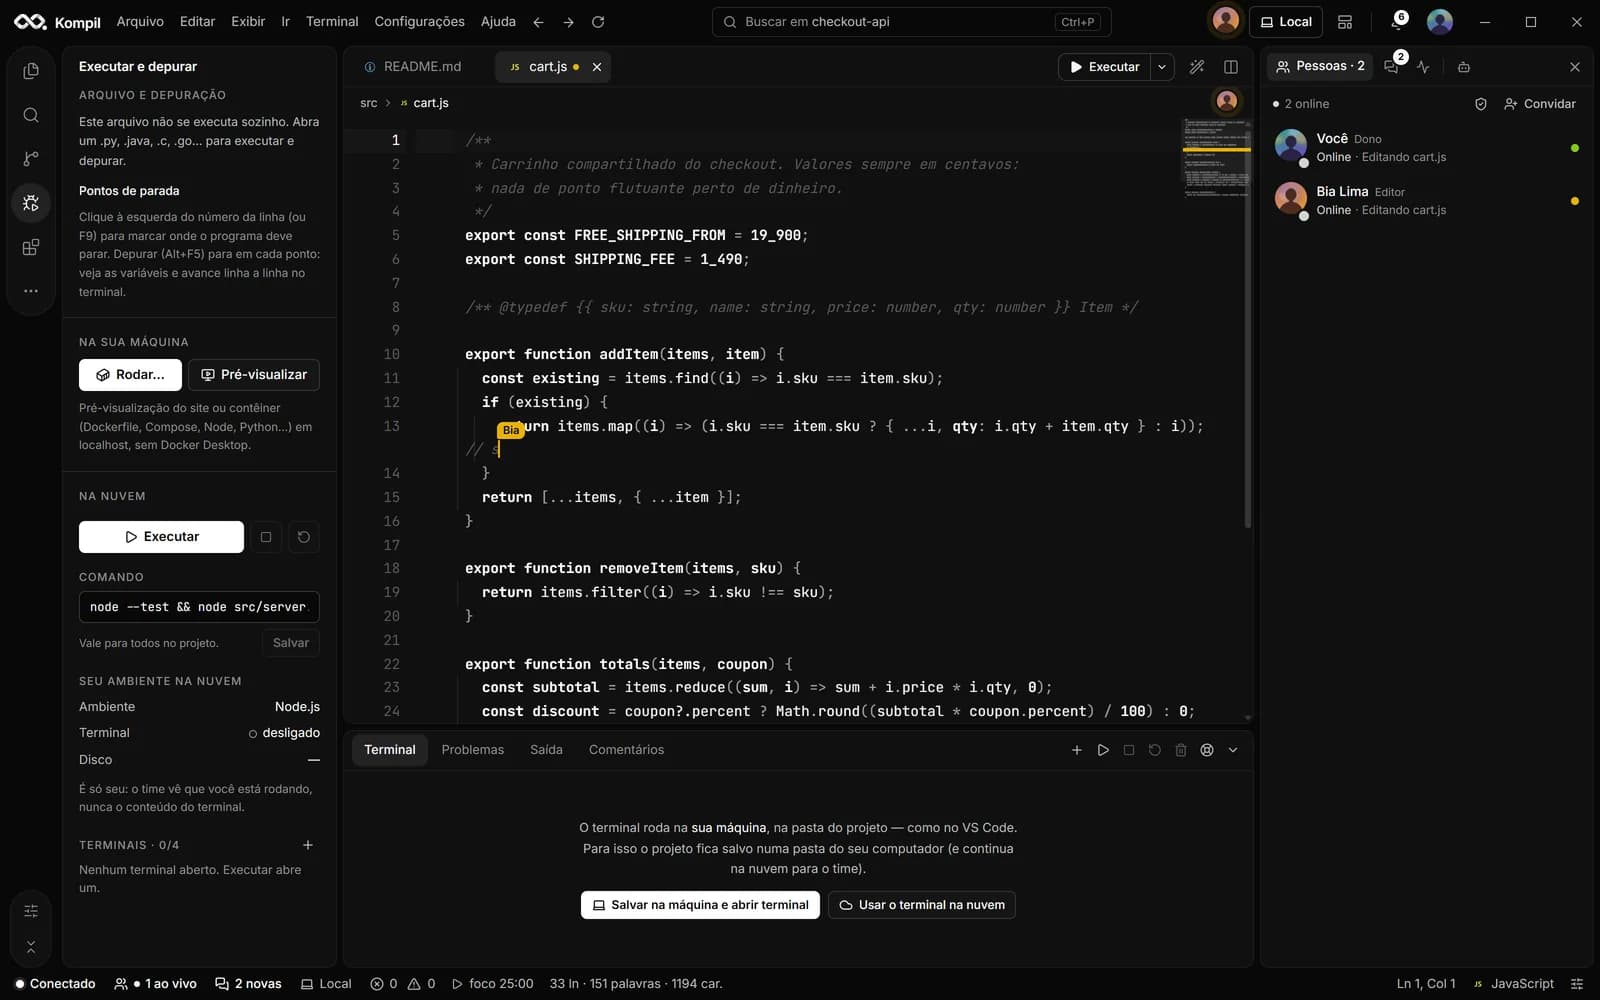
- 09
Turn on Git
In Source control, publish the project to a new repository or link an existing one. GitHub connects from the photo menu, with a device code.
Turn on Git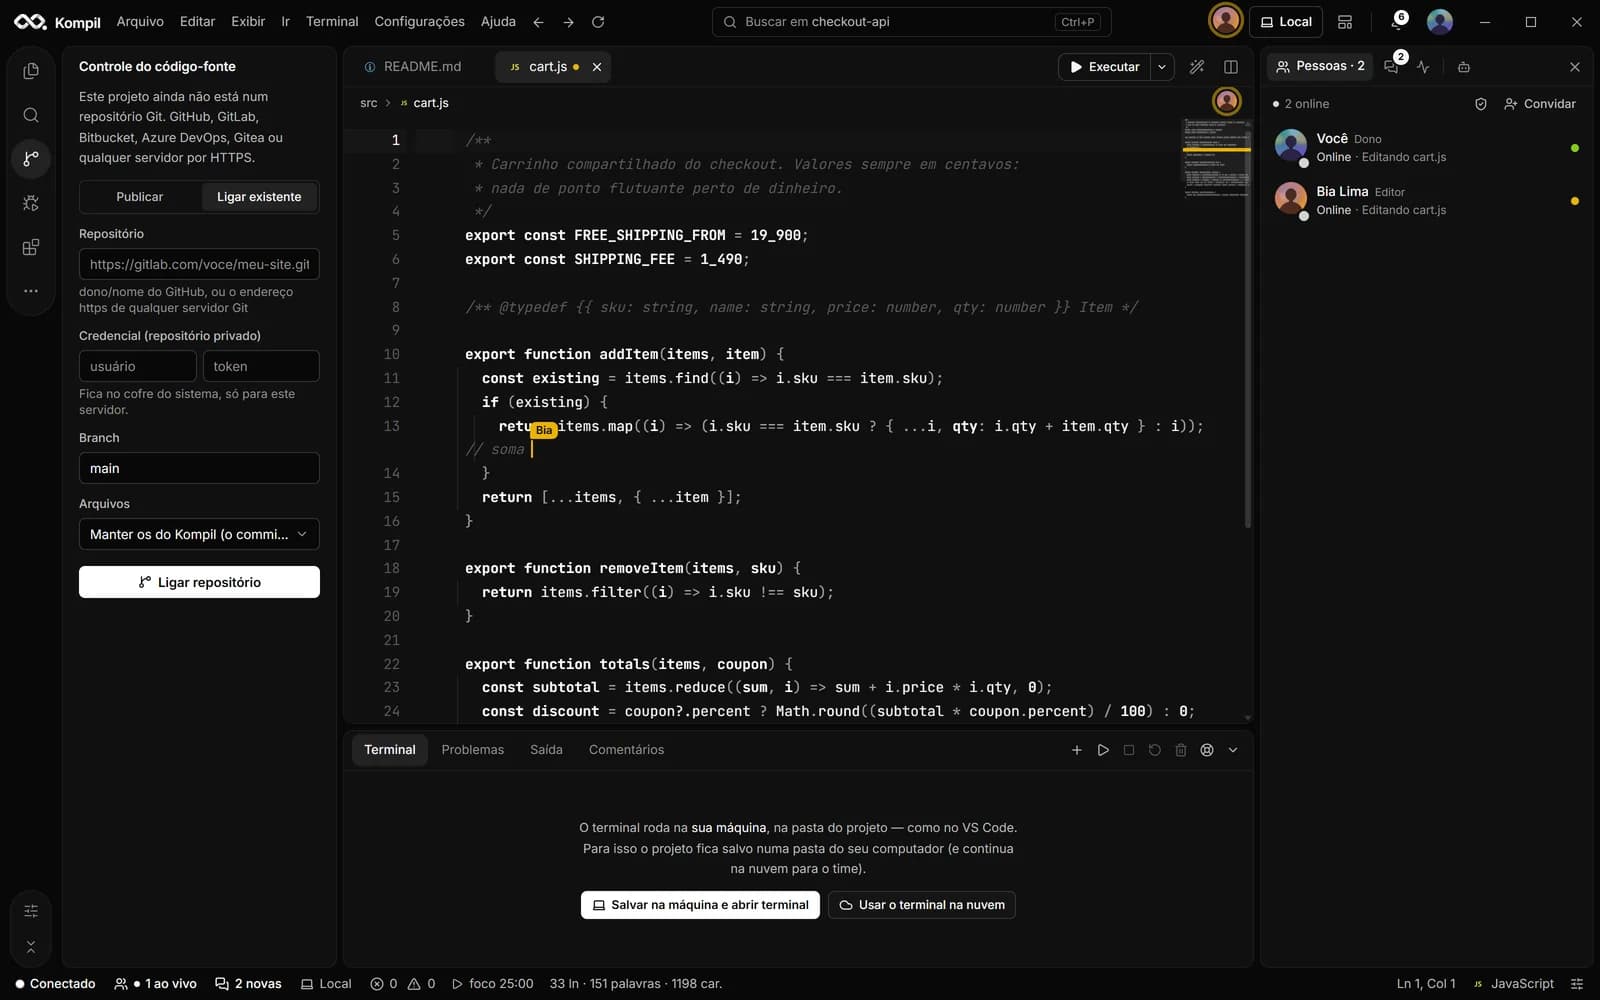
- 10
Connect your AI
Under Settings › AI connections (Configurações › Conexões de IA), paste your key: Kompil shows the provider and the text models on your account, you pick the model and name the connection. In the agent, just choose the connection by name. The key stays encrypted on your computer only.
Connect your AI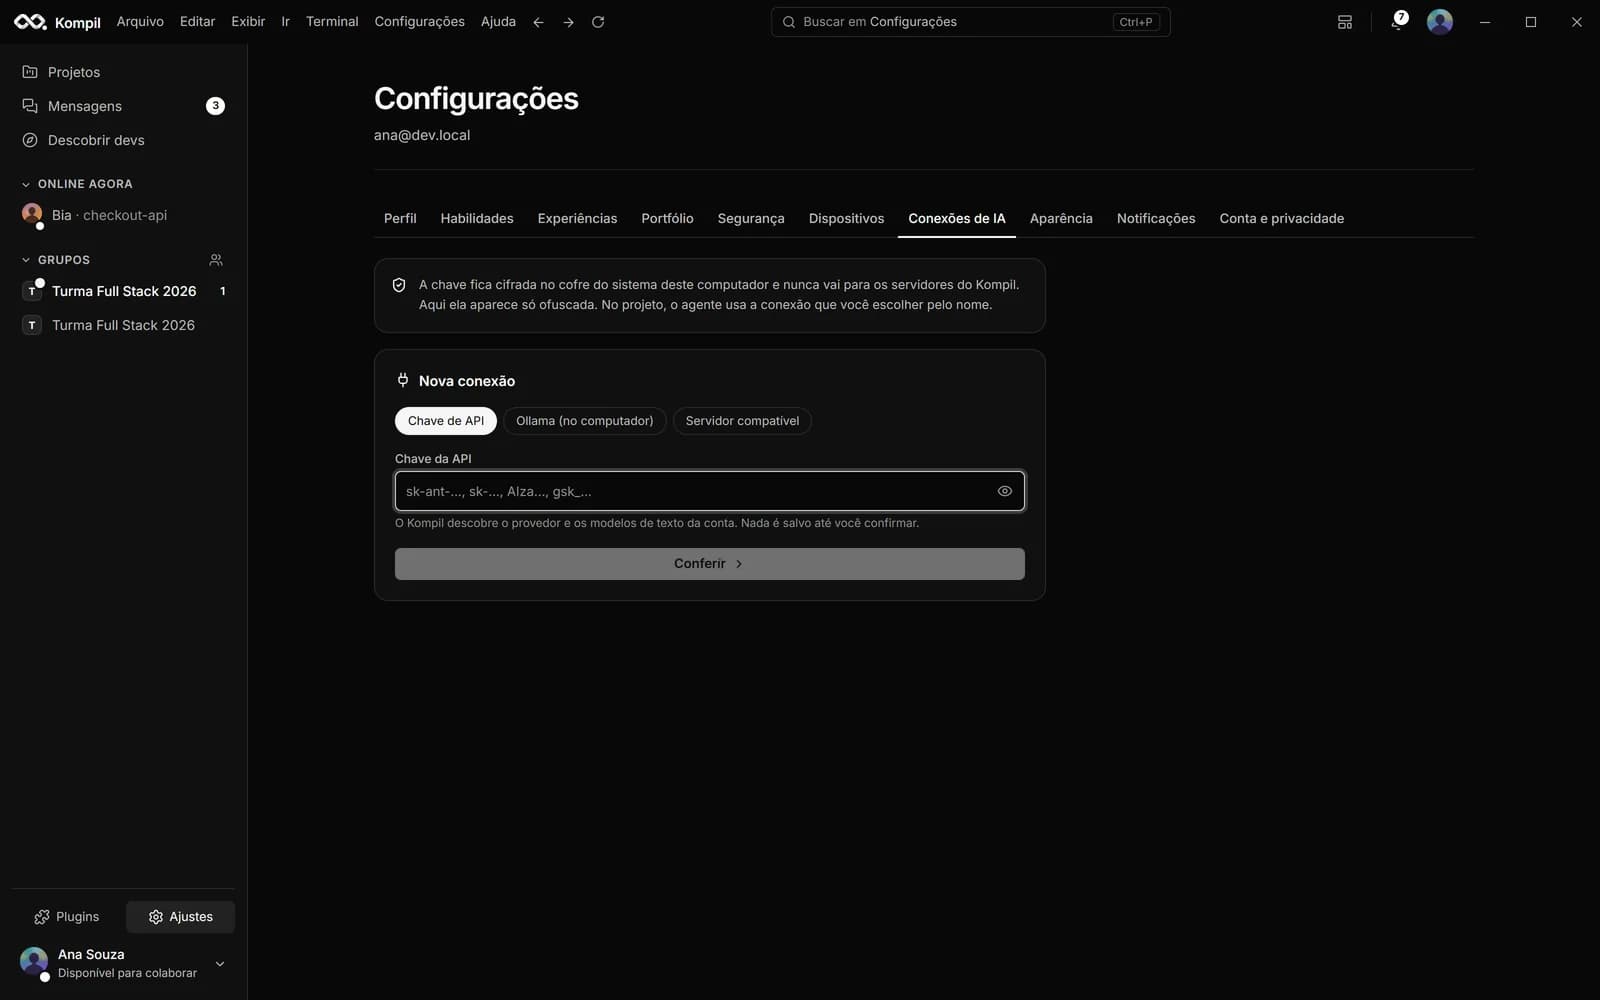
- 11
Make it yours
Change the theme of the whole IDE, show or hide the sidebars and the terminal, and choose the app icon color under Settings › Appearance (Configurações › Aparência).
Make it yours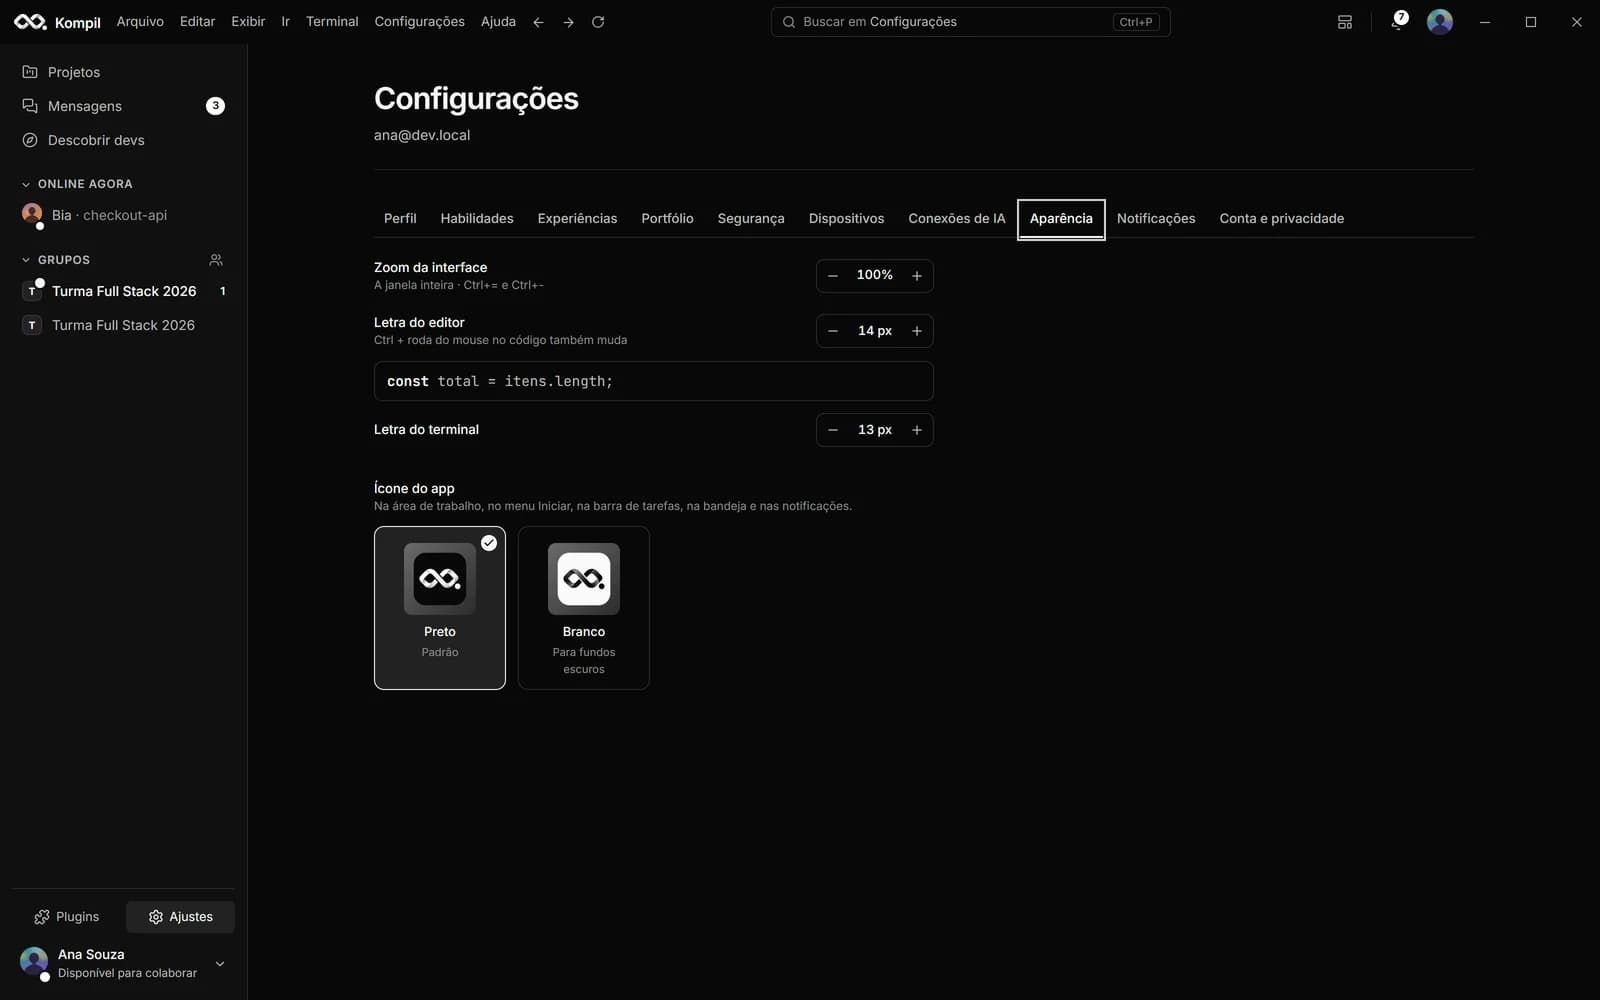







// help › kompil tutorial
The guided tour, step by step
The first time, the screen dims and the important part lights up with an arrow and an explanation. Some steps ask for a click; you can skip at any time.
step 1 of 8
Welcome to Kompil
step 2 of 8
Everything starts here
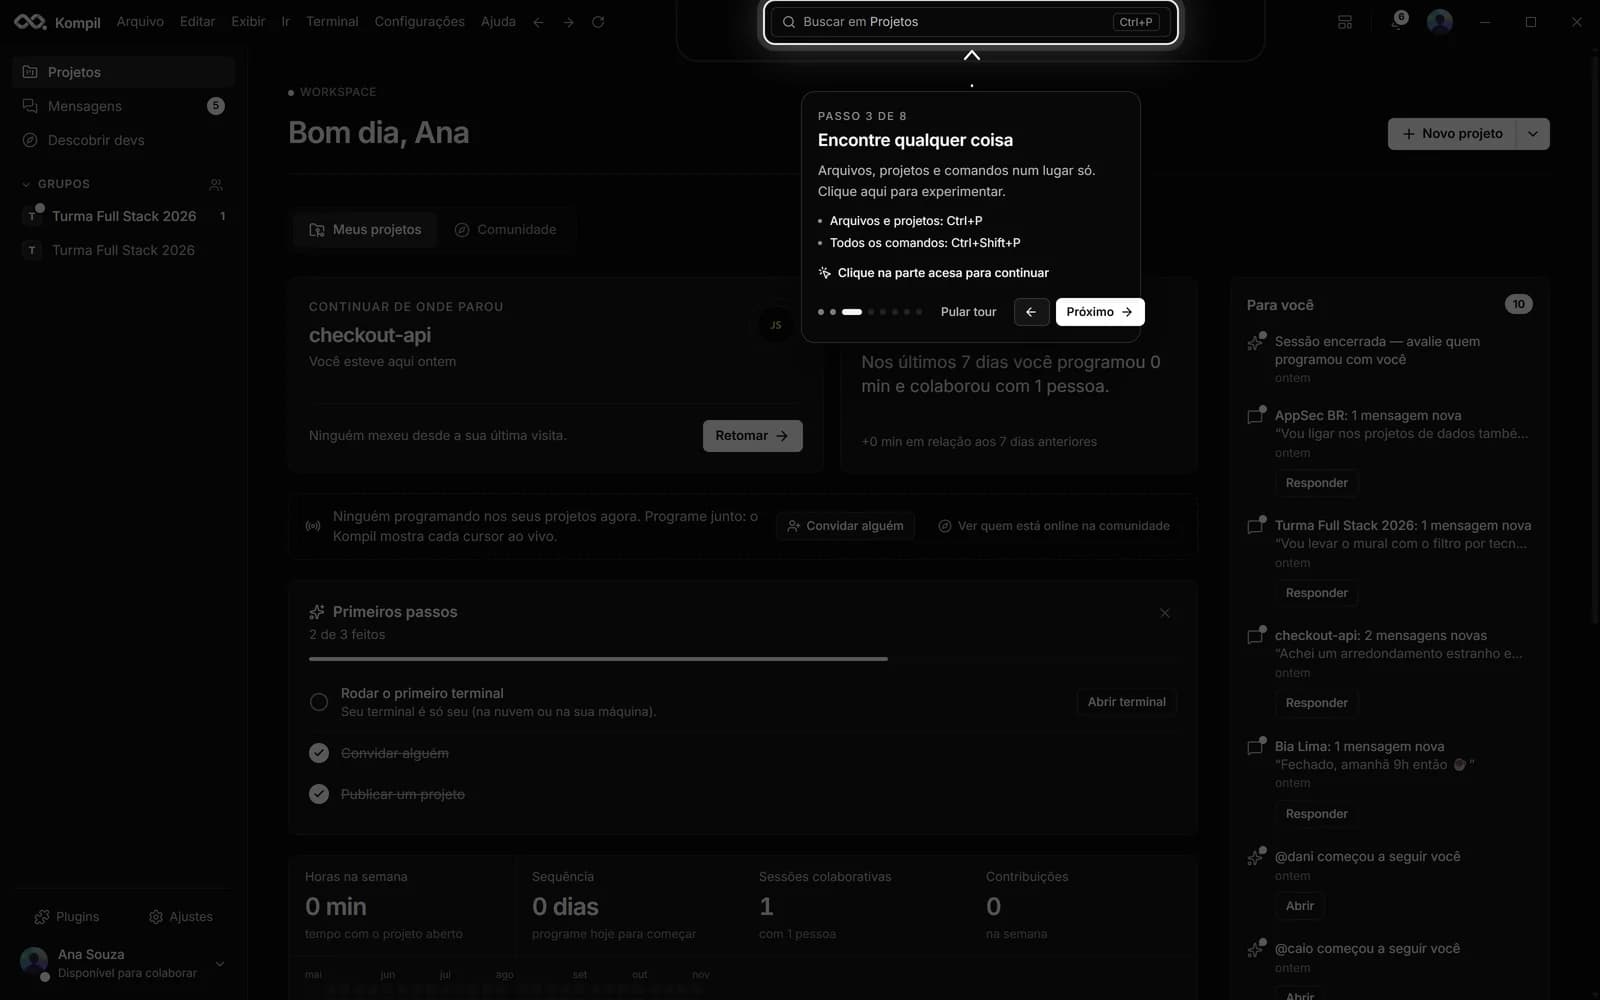
step 3 of 8
Find anything
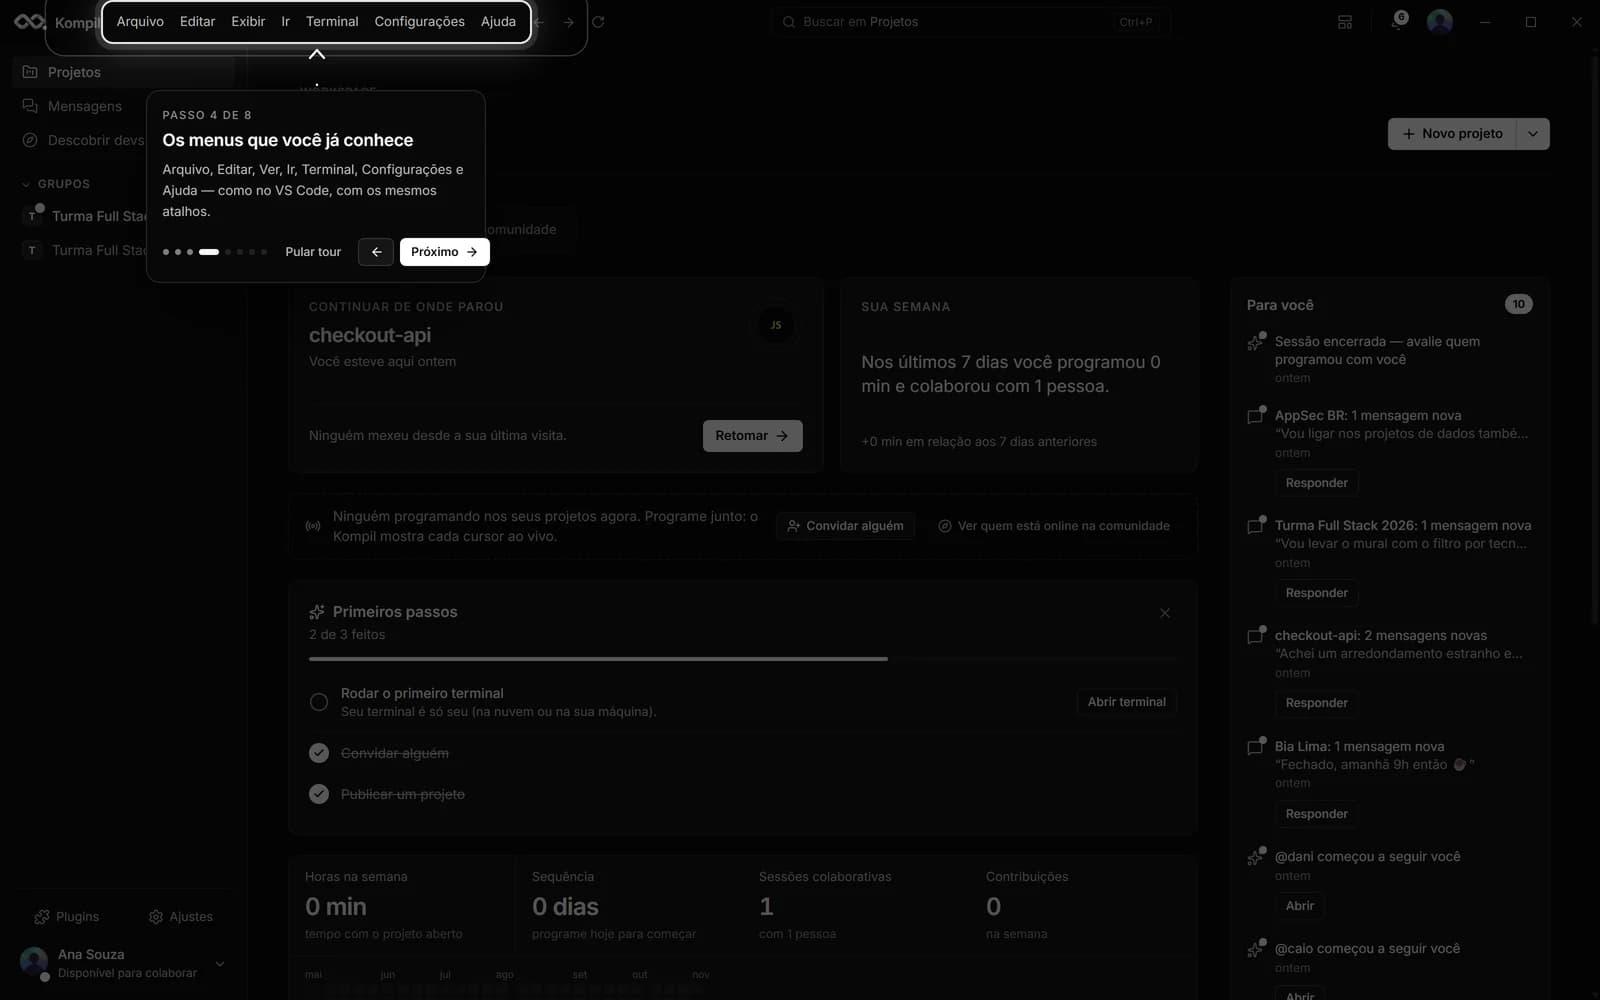
step 4 of 8
The menus you already know
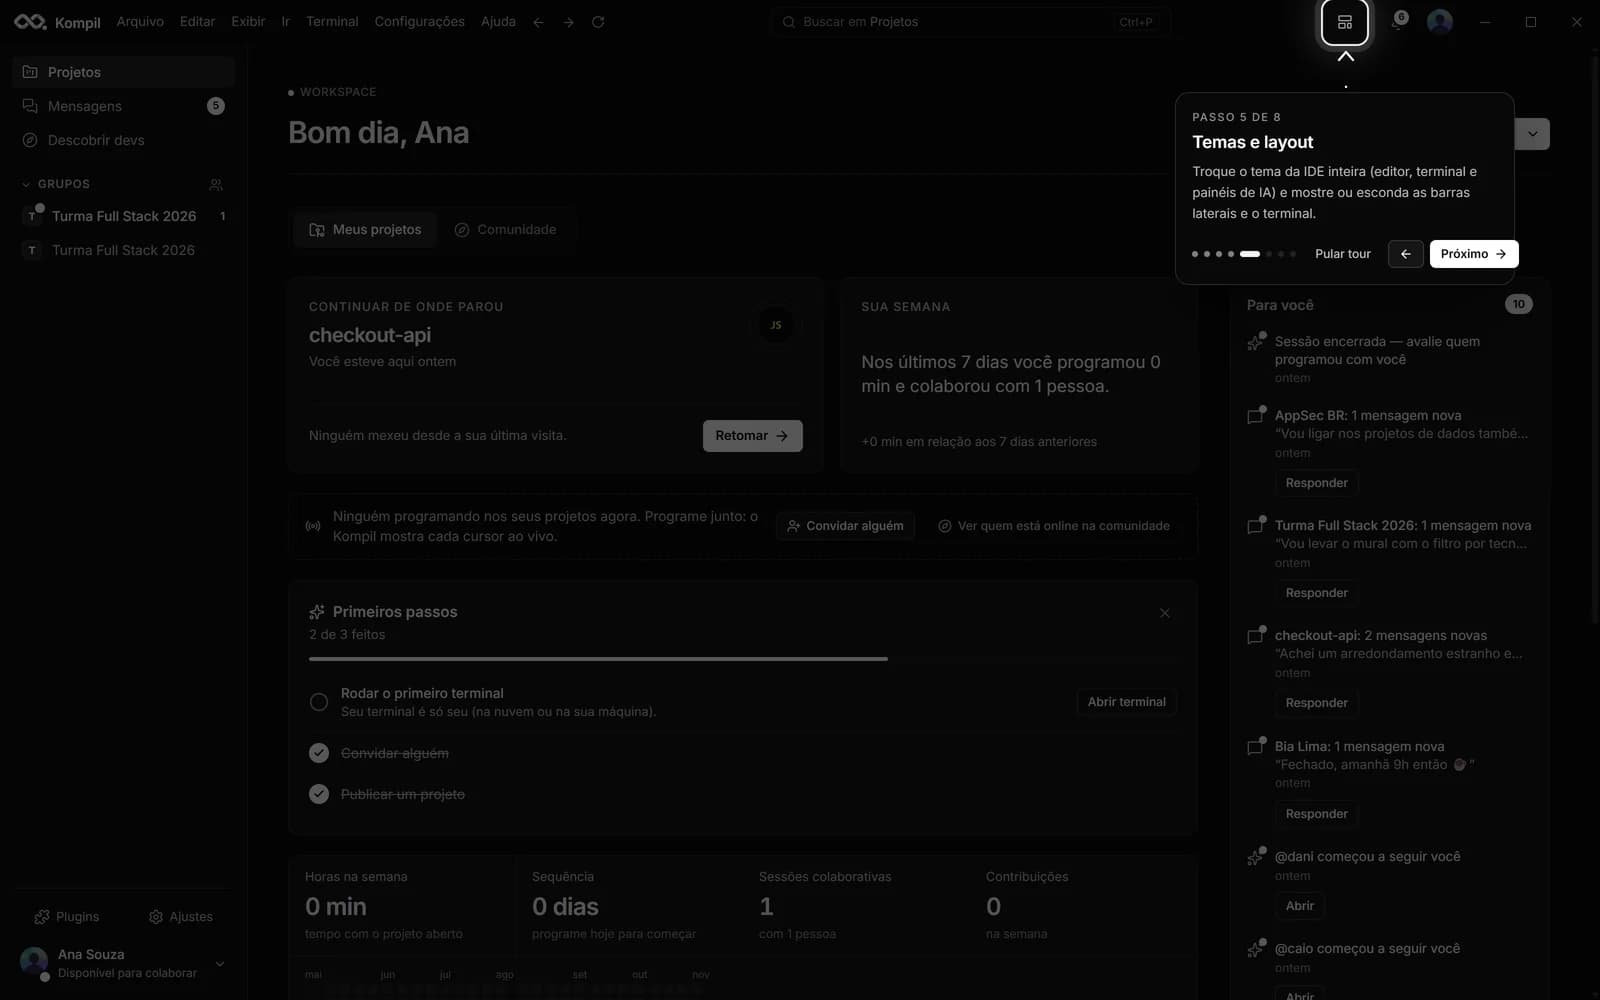
step 5 of 8
Themes and layout
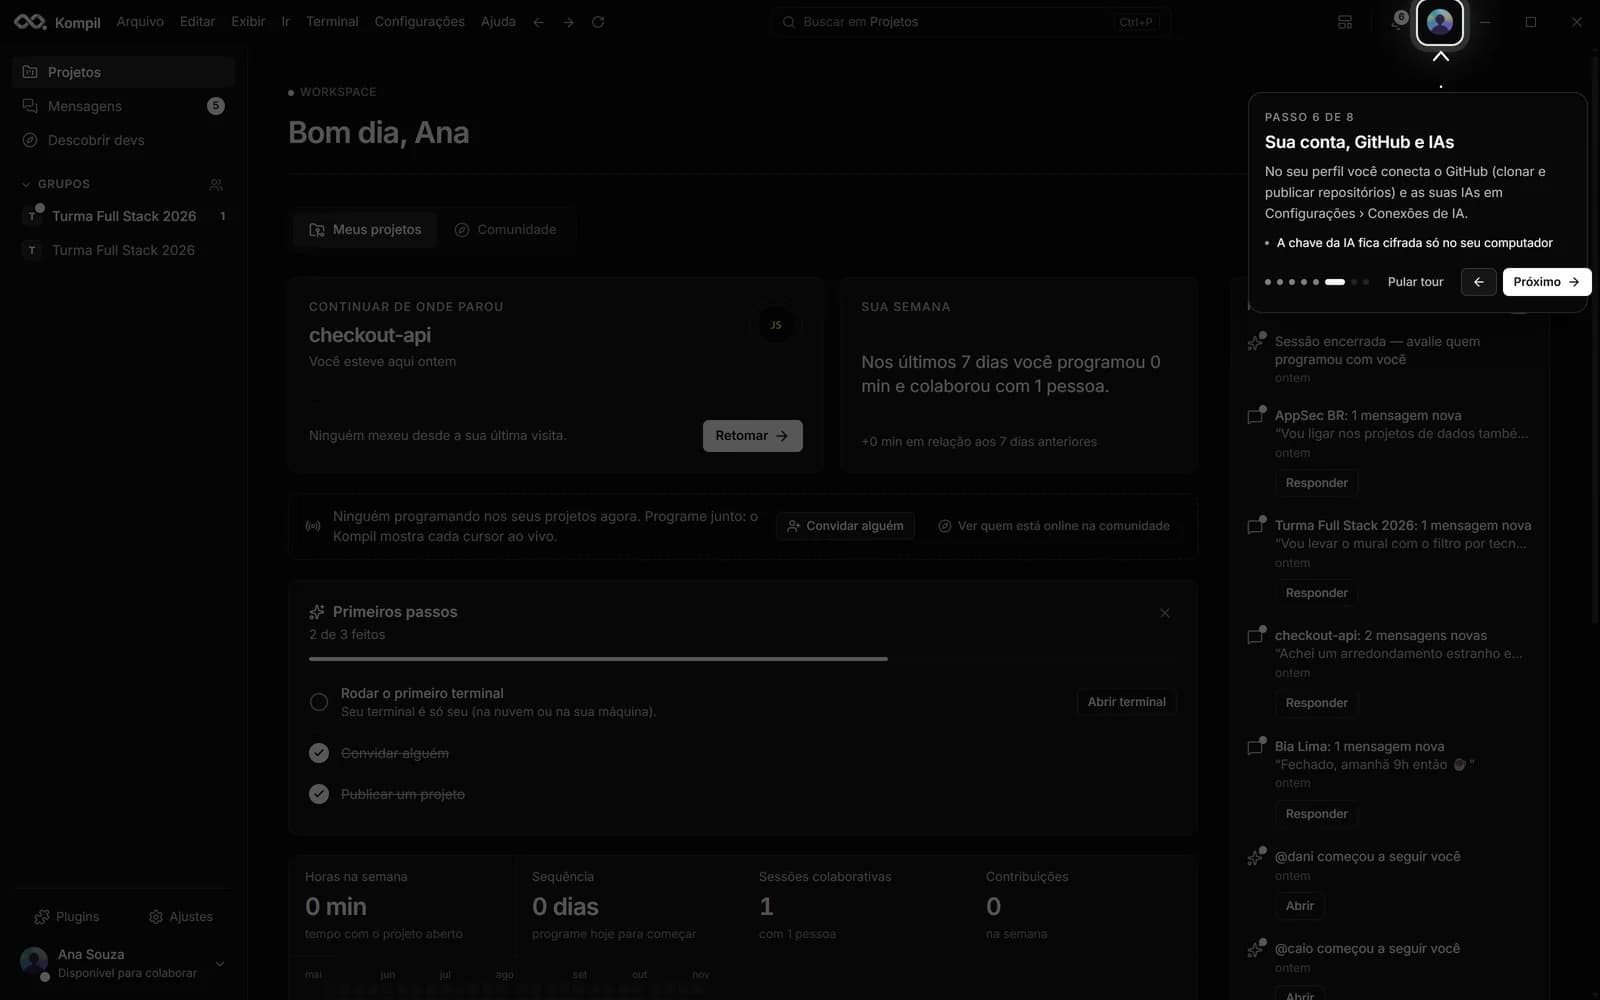
step 6 of 8
Your account, GitHub and AIs
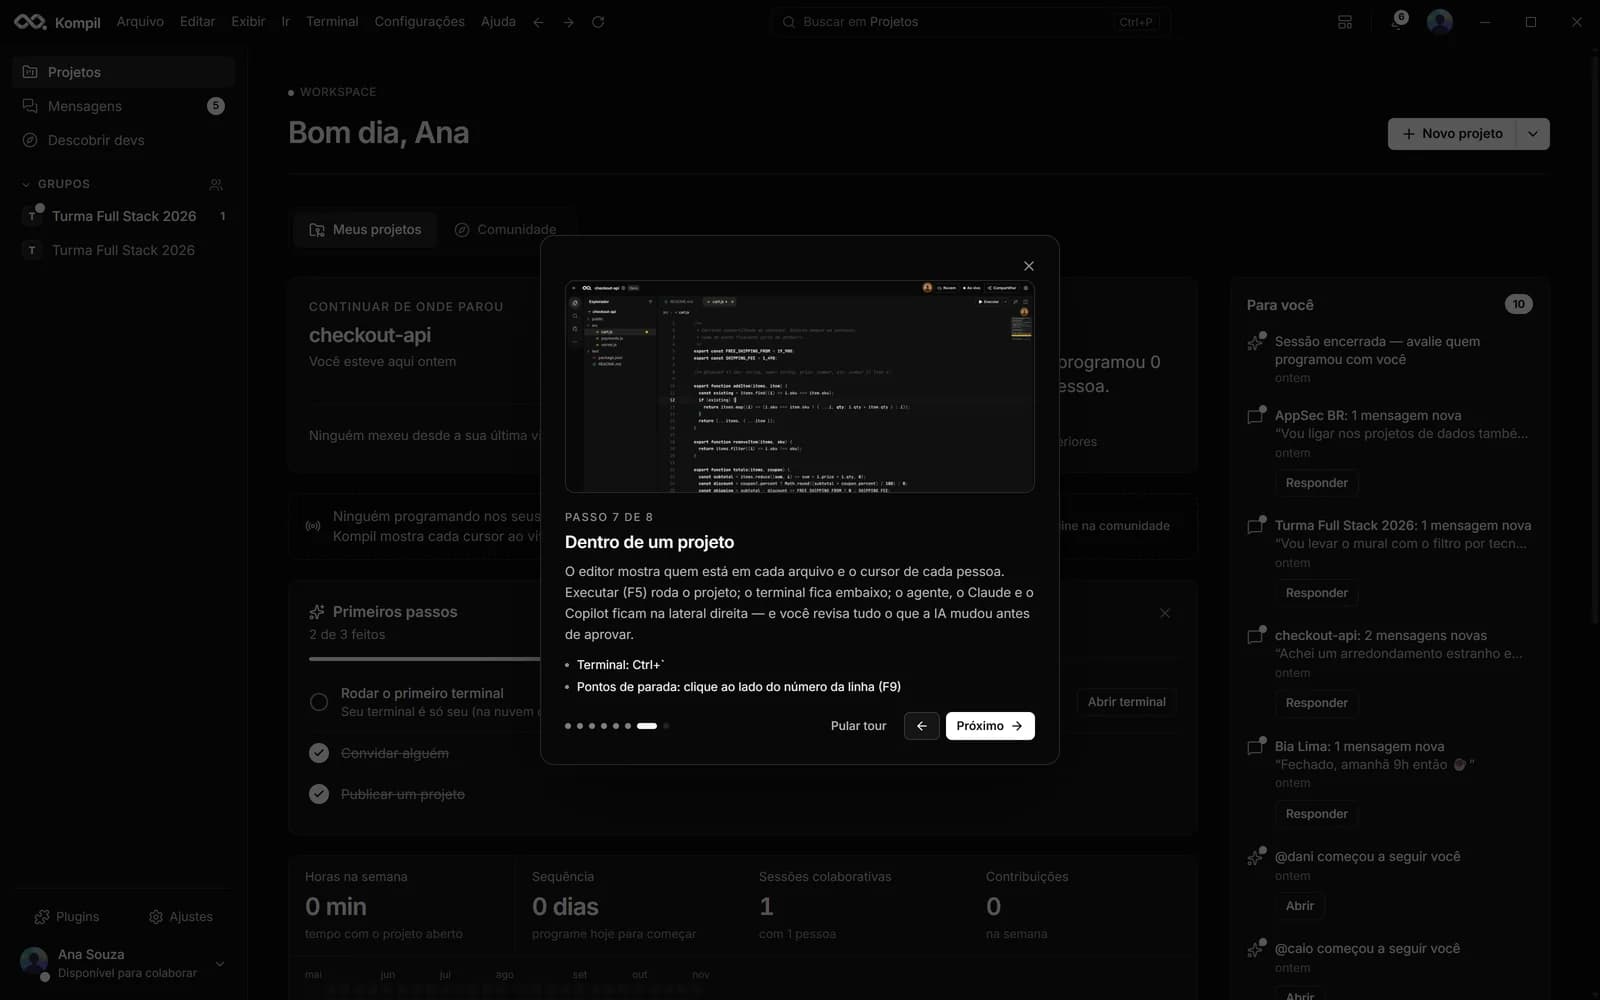
step 7 of 8
Inside a project
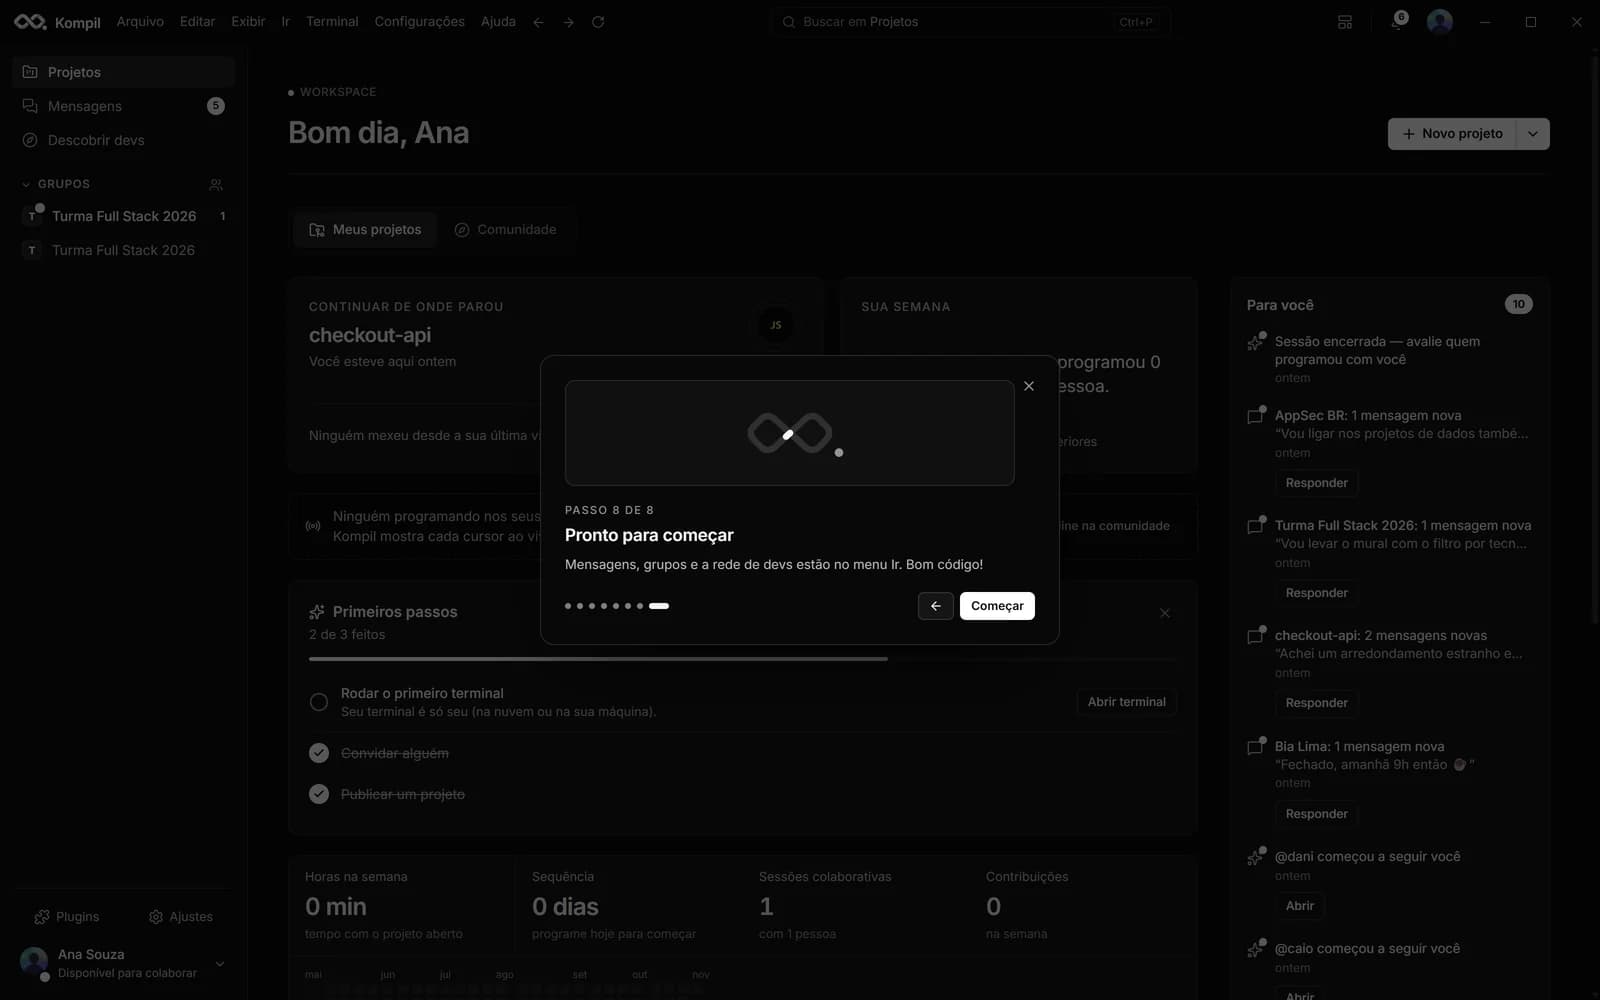
step 8 of 8
Ready to start
// free account
Join the orbit.
Creating an account is free. Download the app for Windows or sign in on the web to edit and chat from anywhere.
- Your AI key stays yoursEncrypted in your system's vault, not on the server.
- Works offlineWith the project saved on your machine, everything syncs later.
- VS Code extensionsYour themes, snippets and extensions come with you.
- Updates itselfNew versions download in the background.
Windows 10 and 11 (64-bit) · macOS and Linux coming soon